
What better way to start off my blogging than with a tutorial? This will be the first of hopefully many tutorials and it will be for a gerbera daisy – one of my absolute favorite flowers. Since I don’t have and unlimited income I always try to come up with ways to make different kinds of flowers without buying new tools and veiners all the time. So the reason I made this particular flower was because I came with up with the idea of shaping aluminum foil around the top of a soda bottle to make a flower shaper. And it worked excellently! So, to the tutorial!
For the flower shaper you’ll need aluminum foil and a soda bottle (unopened).
1.. Take a piece of aluminum foil, approximately 40×15 cm and fold it twice.

2.. Center it on top of the bottle and press down on the sides as on the picture. Take it off and you’re done! Easy peasy! Now, you can shape the foil to give the flower the shape you want. If you want the flower to be very open, you can fold the foil backwards, if you want the flower to be more closed, make more of a cone shape etc.

For the flower you will need:
- Daisy cutters of four sizes: 7 cm, 3,5 cm, 2,7 cm and 1,8 cm across.
- A tooth pick
- Foam pad
- Flower and leaf shaper
- Exacto knife
- White, peach and black Gumpaste (or colors of your choice!)
- Water or edible glue
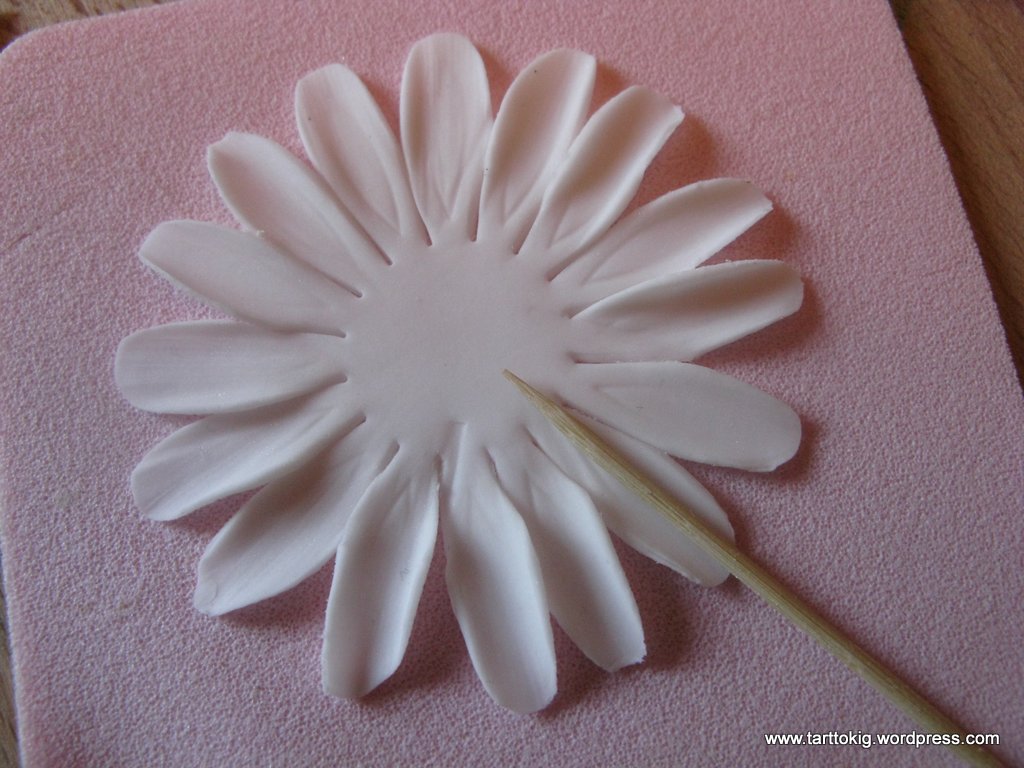
1.. Roll out white gumpaste to about 1-2 mm thickness. Cut out one flower with the largest daisy cutter, place on foam pad, and roll the toothpick once back and forth over each petal. Vein the petals using the flower and leaf shaper (the sharper of the two)
2.. Place the flower in the flower shaper you made earlier
3.. Repeat step one, and attach the second flower to the first using a dab of water/edible glue. Arrange the petals as you want them to look, use tissue paper to help shape your flower. For a more realistic look: don’t make it symmetric! Let there be larger gaps between petals in some places and let them sit closer to each other in other places. Make some petals stand up more than others etc.

4.. Now you will make the center. It is made by cutting out small daisies, flattening the petals using the flat side of the flower and leaf veiner (or a toothpick if you don’t own that tool) and cutting them with an exacto knife, using the following picture as a guide.

5.. Make two of the largest (3,5 cm) flowers in white and attach them. Then make one of the second largest (2,7 cm) and attach that as well.

6.. Then make two of the second largest flowers (2,7 cm) in peach and attach it to the rest.

7.. Roll a ball of black gumpaste, about the size of a chickpea, and flatten it slightly. If you want you can press it against a sieve to give it some structure.
8.. Make three of the smallest flowers (1,8 cm) in peach and attach them one by one around the ball.

9.. Make one of the second largest (2,7 cm) flowers in peach and attach it around the ball as well. Attach the ball to the larger flower. If it isn’t a perfect fit, carefully arrange all the little petals to make it look even.
10.. Leave it until completely dry! I’m always too eager to move my flowers around once I’ve finished them and they often break since they aren’t completely dry… so don’t make the same mistake as I do!

That’s it! I hope you will give it a try, and if you do, I’d be delighted if you’d share a picture of how it turned out! If you have any questions, leave a comment and I’ll try to answer as well as I can.
Good luck!


Beautiful!!!!
Thank you Gisella 🙂
Beautiful.. Thank you for sharing xx
Thank you! I’m glad you liked it 🙂
wonderful….thanks for sharing….looks awesome.
Thank you Lea, I’m glad you liked it!
So pretty!
Thank you! 🙂
Sara! Thanks for these tutorials!!! I followed some of them for my mum’s birthday cake and (although I have to continue practicing….) the result was great!!!! 😀 thaaaanks!!
Some pics here in case you want to see it: http://goo.gl/S8QYI
😀
Thank you Bárbara, your comment really makes me happy! It’s a great feeling to know that others like what I write about! 😀
Pingback: Tools I can’t be without | tarttokig
Pingback: Tutorial – chrysanthemum | tarttokig
WOW, they look so real
Thanks Roshini xx
this is fantastic, beautiful. COngratulations.
Thank you!! 🙂
So pretty! I hope you don’t mind me sharnig this on my facebook page! =)
Thank you, of course I don’t mind you sharing it! 🙂
Pingback: Video tutorial – gerbera daisy | tarttokig
I just read your story and looked at some of your tutorials and I want you to know what an inspiration you are! Your tutorials are amazing! Thank you for sharing.
Thank you very, very much, that’s so sweet of you! xx
Esta hermosa, gracias¡¡¡¡¡
Muchas gracias Cecilia!!
I’m so happy that I’ve found your great tutorial…. Thank you
Thank you Sarah! 😀
Thank you so much for sharing. Wish I had seen this when I made my son’s wedding cake,!
Thank you Carolyn! 🙂 Hope you’ll have use of it in the future instead! 😀
Its beautiful. Thank you for sharing. Can you tell me how to wire this flower, meaning add a stem to it.
Thanks Zita! I’ve never made any of these with wires, but I think a good way would be to simply insert the wire into the black center before adding the center to the flower.
Hi!
When you say soda bottle, what size soda bottle? And on step#4, I understand that the center is made with the smallest daisy cutter, but I don’t understand what your diagram is saying. Do I cut every petal on my small daisy? Is that what you’re saying?
Thanks so much for all of the information! These are beautiful and I can’t wait to make them!
MelissaBakes :))
Hi Melissa!
You can use any size soda bottle since it’s only the cap you use and they are all pretty much the same size. As for the center flowers; you cut each petal into thinner petals, like you said. Hope this helped! 🙂
Thank you for sharing this tutorial and the great tips. . Looks so easy, am still a beginner at cake decorating but this is my favorite flower and will certainly be trying it out.